
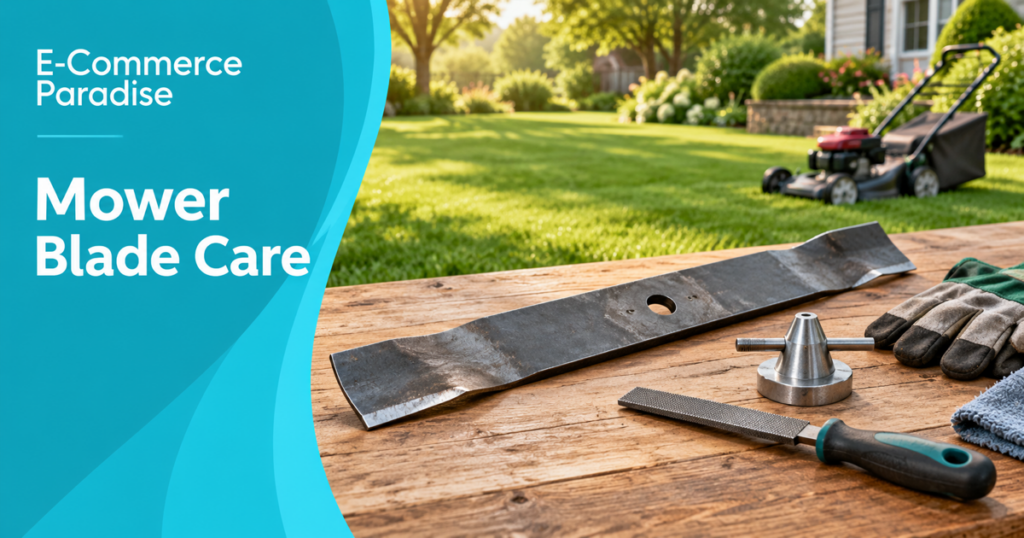
A clean lawn starts with a clean cut. When a mower blade is dull, grass gets torn instead of sliced, which leaves ragged tips and a lawn that can look brown or uneven after mowing. The practical decision is simple: sharpen a sound blade with a worn edge, and replace a blade that is cracked, bent, too thin, or no longer balanced.
This matters for homeowners, but it also matters for ecommerce stores selling outdoor power equipment, replacement parts, or lawn-care accessories. A good product page should help buyers identify the right part and understand when a repair is unsafe. At E-Commerce Paradise, I focus on the same kind of useful product education that earns trust before a customer checks out.
If you are evaluating lawn equipment as a store category, read my complete guide to high-ticket dropshipping first. It explains how I look at durable, serviceable products with real supplier support instead of chasing random low-ticket products.
If inspection shows that you need a new blade, choose a part that matches the mower model and deck. For compatible machines, blades for Cub Cadet mowers are one option to consider when comparing replacement parts. UDC Parts supplies mower components for repair and maintenance.
Why Lawn Mower Blade Sharpness Matters
A mower blade does more than chop grass. Its cutting edge slices each grass leaf, while the blade shape moves clippings through the deck, discharge chute, or bag. A sharp edge leaves a cleaner, more even result.
Dull blades tear grass instead of cutting it. The result is ragged tips, brown or tan discoloration, and long strands left behind in thick areas. The University of Minnesota Extension notes that dull rotary blades fray grass tips and make plants more susceptible to certain diseases, which is why routine blade care belongs in a basic lawn-maintenance schedule.
Before assuming the blade is at fault, check your mowing habits. Wet grass, excessive speed, an unlevel deck, or removing too much grass in one pass can also leave an uneven finish. If those factors are not the problem, remove the blade and inspect it closely.
Signs Your Lawn Mower Blades Need Sharpening or Replacement
Start with the lawn, then look at the blade. Uneven grass, ragged tips, and thin strips of uncut grass are common signs of a dull edge. Vibration, a new noise, or a recent impact with a hard object needs immediate attention.
Turn the mower off before any inspection. Remove the key, disconnect the spark-plug wire on a gas mower, or remove the battery on a battery-powered mower as the manual directs. Never put your hands beneath a deck while a blade might still turn.
How Dull Blades Affect Grass and Mowing Performance
A dull blade leaves grass tips split, ragged, or pale. You may notice a brown cast across the lawn a day or two after mowing, plus uncut strands in thicker sections. The cut may look uneven even if the deck is level.
Those symptoms do not automatically mean replacement. If the blade is straight, undamaged, and still has sufficient metal, sharpening is usually the sensible move. Check grass height, moisture, and mowing speed before deciding the blade is the only issue.
How to Spot Worn, Bent, or Damaged Blades
Inspect both cutting edges along the full length of the blade. Small nicks and a dull edge are repairable. Deep chips, cracks, bends, heavy corrosion, thin metal, or a damaged lift section call for replacement.
Inspect the blade adapter, spindle area, and mounting hardware after a hard impact. Do not try to straighten a bent blade with a hammer or heat. A damaged blade can fail at operating speed, so replacement is the safer call.
Use these signs to decide whether the blade needs sharpening, replacement, or a closer inspection:
- Sharpening may be enough: The blade is straight, has no cracks, and only has a dull edge or small nicks.
- Replacement is needed: The blade is bent, cracked, deeply chipped, badly corroded, thin, or worn beyond the manufacturer’s limits.
- Stop and inspect: The mower vibrates, makes a new noise, or has struck a hard object.
Sharpening vs. Replacing Lawn Mower Blades: Key Differences
Sharpening removes a small amount of metal to restore the existing cutting edge. It only makes sense when the blade is straight, crack-free, and thick enough to remain safe. Replacement gives you a new edge and a blade that still has its original shape.
| Factor | Sharpen the blade | Replace the blade |
|---|---|---|
| Blade condition | Straight, sound, and lightly worn | Cracked, bent, badly worn, or damaged |
| Upfront cost | Often lower when you do the work | Higher because you buy a new part |
| Tools and skill | Needs safe removal, sharpening, and balancing | Needs the correct fit and safe installation |
| Expected result | Restores an existing blade within its limits | Provides a fresh edge and unworn shape |
Neither option is automatically the cheaper choice. A homeowner with a vise, file or grinder, safety gear, and a blade balancer may spend little to sharpen a good blade. A new blade is a better value when the old one is near its service limit or would need too much grinding to restore safely.
When Sharpening Is the Better Option
Sharpen the edge when it is dull but the rest of the blade remains in good condition. Small nicks are usually fine if you do not remove excessive metal. Follow the original bevel rather than creating a new angle, and remove material evenly from both ends.
You need secure blade removal, a vise, eye protection, heavy gloves, an appropriate file or grinder, and a reliable balancing method. If you do not have the tools or are unsure about the inspection, a qualified service shop is worth the cost. Briggs & Stratton’s maintenance guidance also emphasizes a sharp blade for a clean cut and safe deck cleaning procedures.
After sharpening, inspect the edge again. If it looks thin, uneven, or close to a manufacturer’s wear limit, stop there and replace the blade instead.
When to Replace Lawn Mower Blades
Replace a blade that is cracked, bent, deeply chipped, excessively worn, or badly corroded. A worn blade may no longer create the lift needed for its intended bagging, mulching, or discharge setup. Multiple sharpening cycles also move the cutting edge back and reduce usable material.
Use the blade type designed for the mower model, deck size, and use case. A mulching blade and a high-lift blade serve different purposes, so do not expect a standard blade to perform the same job. Match the part number to the operator’s manual and confirm fitment before ordering.
The U.S. Consumer Product Safety Commission advises operators to keep guards and safety devices in place, clear debris before mowing, and shut the mower down before clearing a clogged chute. Its walk-behind mower fact sheet is a useful safety reference before any maintenance work.
How to Sharpen Lawn Mower Blades Safely
Safe sharpening begins with safe removal. Read the operator’s manual for the exact procedure and tools for your mower. Let hot surfaces cool, prevent accidental starting, and do not sharpen a blade while it is still mounted.
For a gas mower, disconnect the spark-plug wire and keep it away from the plug. For a battery mower, remove the battery as directed. Wear heavy gloves and eye protection, then clamp the blade securely in a vise before filing or grinding.
Follow these steps to sharpen a blade and prepare it for safe use:
- Remove the blade: Block it from turning, loosen the fastener with the correct tool, and note the blade orientation before removal.
- Clean and inspect: Remove grass and dirt, then check both edges, the lift sections, and the center hole for damage.
- Sharpen the edge: Use a suitable file or grinder and follow the original bevel.
- Balance the blade: Use a blade balancer or a manufacturer-approved method. Remove only a small amount from the heavy side until the blade sits level.
- Reinstall and test: Fit the blade in the correct direction, tighten the fastener to the manual’s specification, reconnect power, and check for vibration.
If the blade is cracked or cannot be held securely, replacement or professional service is the right answer. The risk is not worth saving a few dollars.
How to Replace Lawn Mower Blades
Find the complete mower model number before buying a replacement. Blade length, center-hole shape, mounting-hole pattern, lift type, and rotation direction all matter. Some decks use more than one blade, and those blades are not always interchangeable.
Check the manufacturer’s parts list, especially if the mower has a mulching plug or bagging system. A correct replacement sits flat on the mount and keeps the deck operating as designed.
Use this process to remove the old blade and install the correct replacement:
- Prepare the mower: Park on a level surface, switch it off, remove the key, and disconnect the spark-plug wire or battery as directed.
- Access the blade: Follow the manual to tilt a walk-behind mower or remove the deck from a riding mower. Use proper support and never rely on a jack alone.
- Remove the old blade: Wear gloves, stop the blade from turning with a wood block or approved holder, and remove the fastener.
- Fit the new blade: Clean the mounting surface and install the blade in the correct direction. Make sure it sits flush on the adapter or spindle.
- Tighten and check: Use the specified torque, reinstall guards or deck parts, and confirm all hardware is secure before restoring power.
What Ecommerce Sellers of Lawn Equipment Need to Get Right
If you sell mower parts or outdoor equipment online, fitment information is part of customer service. List the mower models, deck sizes, blade length, center-hole pattern, rotation direction, and blade type in a clear format. A shopper should not need to guess whether a blade fits their machine.
Start with the high-ticket niches list if you are still deciding whether outdoor power equipment fits your store. Higher-order-value equipment often brings more serious buyers, but the product catalog needs accurate technical details and real support.
Supplier quality is just as important. My supplier sourcing guide lays out the due diligence I use before adding brands, including dealer authorization, warranty terms, lead times, and product data.
A Shopify store makes it easier to organize parts by brand, model, and fitment. Use product pages to answer common installation and safety questions before the buyer reaches support.
Post-purchase education matters as much as product-page copy. A short Klaviyo sequence can send care reminders, operator-manual links, and a service checklist after delivery without asking a customer to remember every detail.
Give your support team a verified fitment workflow before they suggest a part. Gorgias is useful for keeping those customer questions, model details, and order records in one help-desk workflow.
Customer feedback can also expose unclear fitment language. Use Yotpo reviews to identify recurring questions, then update the relevant product pages with the answer.
If you are building a real parts catalog, supplier feeds need the same attention as the storefront. Inventory Source is worth reviewing when you need to manage supplier product data and inventory feeds instead of doing every catalog update by hand.
Run the business basics before supplier applications or paid traffic. The business formation checklist covers the legal and financial foundation that supports a store built to last.
If you want help turning a product category into a focused, supplier-backed store, my coaching service is the place to start. For operators who want the build handled for them, the turnkey store service covers setup, supplier outreach, and the foundation work.
Build a Simple Blade Inspection Routine
Do not wait for a terrible cut or a loud vibration before checking the blade. A quick inspection before the season starts, after a hard impact, and before a long stretch of mowing helps you catch problems before they damage the deck, spindle, or lawn.
Look for a straight blade profile, a consistent cutting edge, a sound center hole, and a lift section that has not been worn down or bent. Check mounting hardware for wear or looseness. If you are comparing a replacement part, use the mower model number and manual as the source of truth instead of matching from a product photo alone.
Keep a note of the last service date and what work was done. That takes less than a minute and removes guesswork later. It is also useful for a seller handling warranty questions, because the customer has a clear record of whether the blade was sharpened, balanced, or replaced.
Safety is the non-negotiable part. The CPSC says to turn the mower off and make sure the blade has stopped before clearing a chute or working near the deck. Wear eye protection and gloves, keep people away from the work area, and leave a blade that looks questionable for a service professional.
Lawn Mower Blade Sharpening vs. Replacement Costs
Cost depends on the mower, blade design, local labor rates, and the tools you already own. Sharpening at home may only involve the wear on a file or grinding wheel, but a vise, eye protection, a balancing tool, and proper removal tools are still part of the cost.
A service shop may charge for blade removal, sharpening, balancing, and reinstallation. Labor rises for riding mowers when deck removal is involved. A replacement blade adds the part cost, but it is often the lower-risk choice if the original is damaged, thin, or difficult to balance.
Compare a few local service quotes against the correct replacement part. Do not choose the cheapest route if it leaves you using a compromised blade or skipping the balance check.
How Often Should You Sharpen or Replace Lawn Mower Blades?
There is no universal schedule. Many owners inspect blades before the mowing season and sharpen them about once per season, but heavy use, sandy soil, stones, roots, and frequent mowing may require more frequent checks.
Let the blade condition and the operator’s manual guide the decision. A large lawn cut every few days wears a blade faster than a small lawn cut weekly. Replace the blade once it reaches the manufacturer’s wear limit or develops damage that sharpening will not resolve.
Tips for Extending Lawn Mower Blade Life
Walk the lawn before mowing and remove sticks, stones, toys, wire, and other debris. Mow dry grass when possible, use a height that suits the grass type and season, and avoid removing too much growth in a single pass.
Clean grass buildup from the deck only after the mower is fully shut down and secured. Keeping the deck clean reduces clumping and makes routine inspections easier. The University of Minnesota Extension’s mowing practices guide also recommends sharp blades and an appropriate mowing height for healthier grass.
The decision between sharpening and replacement comes down to condition. Sharpen a straight, solid blade with enough metal remaining. Replace bent, cracked, heavily chipped, burned, or worn blades. Use the correct part, follow the manual, and get a qualified technician to inspect anything you are unsure about.
Related Articles
If you found this useful, these guides go deeper on the ecommerce side of choosing and selling durable products:
- How to Pick a Profitable Niche for High-Ticket Dropshipping
- What Is High-Ticket Dropshipping?
- High-Ticket Niches List
- How to Find the Best High-Ticket Dropshipping Suppliers
- Business Formation Checklist for High-Ticket Dropshipping

Trevor Fenner is an ecommerce entrepreneur and the founder of Ecommerce Paradise, a platform focused on helping entrepreneurs build and scale profitable high-ticket ecommerce and dropshipping businesses. With over a decade of hands-on experience, Trevor specializes in high-ticket dropshipping strategy, niche and product selection, supplier recruiting and onboarding, Google & Bing Shopping ads, ecommerce SEO, and systems-driven automation and scaling. Through Ecommerce Paradise, he provides free education via in-depth guides like How to Start High-Ticket Dropshipping, advanced training through the High-Ticket Dropshipping Masterclass, and fully done-for-you turnkey ecommerce services for entrepreneurs who want a faster, more hands-off path to growth. Trevor is known for emphasizing sustainable, real-world ecommerce models over hype-driven tactics, helping store owners build scalable, sellable, and location-independent brands.